Overview
Gnarles here. We're going to talk about the lower third.
You know the lower third. It's the chrome bar at the bottom of the screen with your guest's name and what they do for a living. It's the title card that lands at the cold open. It's the little "FOLLOW" button you tuck into the corner of the Reel so the algorithm has something to grab. It's broadcast vocabulary. It's been broadcast vocabulary since the 80s.
It's also the thing that used to mean opening a second app.
You'd finish the cut. You'd realize you needed three lower thirds. You'd Cmd-Tab to Photoshop. Forty minutes later you'd come back to the cut with three PNGs in a folder and a vague sense that you'd lost the thread of the edit.
That tax is gone. We built overlay generation into the chat. You describe what you want in a sentence. The model renders it with a real alpha channel. It lands on the overlay track. The cut keeps cutting.
1. The Photoshop tax
Adobe Photoshop is $22.99 a month all by itself (adobe.com/products/photoshop). Illustrator is another $22.99. The "Creative Cloud All Apps" bundle is $59.99 a month. If you've been paying that toll because your editor couldn't draw a name tag, you have been paying $720 a year for the privilege of making rectangles with text in them. Add a lower third free
That's the money tax. The time tax is worse.
Every lower third you ever built in Photoshop went through the same routine. Open the app. Type the name. Resize the type. Pick the typeface. Pick the two colors. Hide the background layer. Export PNG. Drag it back into your editor. Notice it's two pixels too tall. Reopen. Resize. Re-export. Drag. Watch. Realize the cyan is too aggressive over the sunset shot. Reopen. Repick. Re-export. Drag. Watch.
Seven minutes per lower third when you're warmed up. Twenty when you're not. Multiply by every guest in every interview. That's the tax. That's what we cut.
2. What you can generate
The overlay generator covered nine kinds of asset out of the gate. We picked them by walking through every reason a creator opens a second app, and then making sure each reason had a covered case.
- Lower thirds. Broadcast name tag — name on top, title underneath, transparent background, your brand colors. The classic.
- Title cards. Bold intro graphics for cold opens and chapter breaks. Bigger type, more presence, same alpha background.
- Text overlays. A single line of text that sits over a shot — a key quote, a question, a stat callout, a punchline timer.
- Logo watermarks. Subtle, semi-transparent branding for a corner of the frame. Non-intrusive on purpose. The viewer registers it. The viewer doesn't fight it.
- Call-to-action buttons. "Subscribe." "Follow." "Link in bio." A real button shape with your primary color, ready to anchor in a corner or land at the end of the cut.
- Social media handles. Your @ with the right platform iconography around it, sized for the corner of a Reel or a Short.
- Animated-style graphics. Decorative shapes — flourishes, swooshes, sweeps — for transitions and accents. Static images that read as kinetic.
- Geometric shapes. Hexagons, circles, rectangles, ribbons. The atomic units of design. Useful when you want to build something custom on top.
- Custom. You describe whatever you want in a sentence. The model renders it. If your sentence is good, your overlay is good.
That's the catalog. Nine types. One sentence each. No round-trip.
Under the hood, every one of these flowed through the same generator in server/overlayGeneration.ts. You picked a type, you supplied your text, you optionally passed a style (modern, minimalist, bold, elegant, playful), and you optionally passed colors. The function built a type-specific prompt — the lower-third prompt is different from the title-card prompt is different from the call-to-action prompt — and sent it to gpt-image-1 at 1024x1024 with a base64 response. The result got uploaded to object storage, recorded in your overlay library, and was ready to drop on the timeline.
You didn't pick the model. The model was already picked. You described the asset.
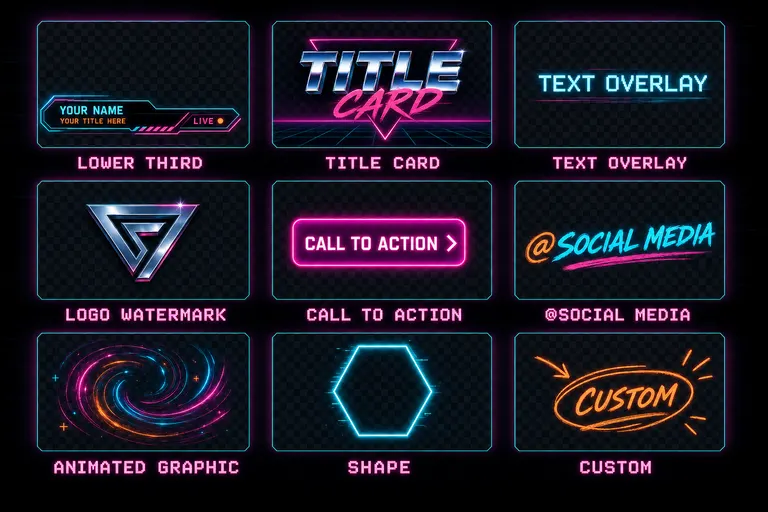
A grid of nine glowing overlay samples — lower third, title card, text overlay, logo watermark, call to action, social media, animated graphic, shape, custom
3. Transparency — why the alpha channel matters
This is the part that mattered most, and it's the part that's hardest to explain to someone who hasn't fought it. Open the overlay library
A PNG has four channels — red, green, blue, and alpha. Alpha tells the renderer "this pixel is invisible." 100% means solid, 0% means see-through, and the values in between are how you get a soft edge on a glowing name tag.
Most AI image generators don't produce alpha. They produce a flat RGB rectangle with a colored background, and you spend the next ten minutes in Photoshop magic-wanding the background out and feathering the edge so the cut-out doesn't look like a kindergarten craft.
We built the overlay generator to demand a transparent background in every prompt. Every one of the nine type prompts in server/overlayGeneration.ts includes "Transparent background" or "PNG with alpha" explicitly. The lower-third prompt says "Must have transparent background (PNG with alpha)." The title card prompt says "Transparent background. Bold, impactful typography." The custom prompt says "Transparent background, suitable for video overlay." We pinned the model to the only output that's actually useful in a video edit.
The asset that landed on your timeline composited cleanly over your footage. No black box around the name. No white halo. No magic-wand surgery. The sunset showed through the gaps in the chrome bar. The palm tree showed up next to the title text. Alpha did its job.
This was the difference between an overlay that looked generated and an overlay that worked. The former is a sticker. The latter is broadcast.
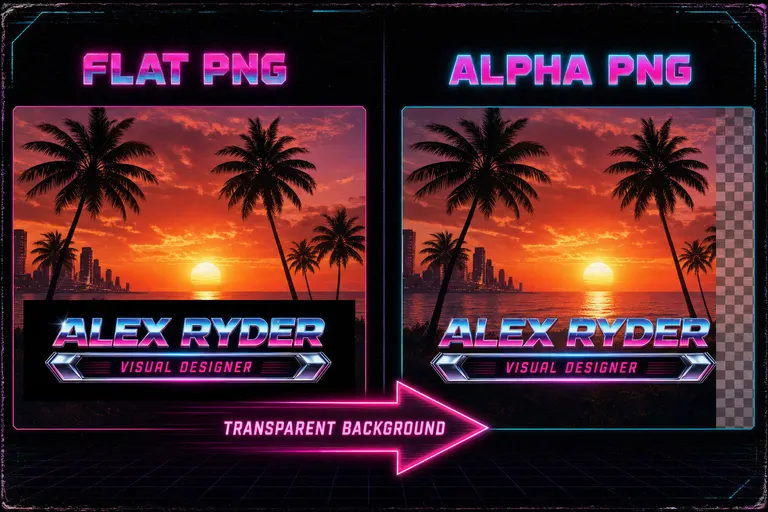
Two overlay samples side by side — one with a solid black background looking like a sticker, the other with a transparent alpha background floating cleanly over a sunset shot
4. The describe-it-once-use-it-everywhere library
Generation was step one. Persistence was step two.
Every overlay the generator made got stored as a row in the overlays table with the original prompt, the style config, the colors, the position, the animation, the duration, the dimensions, and the public URL of the rendered PNG. It wasn't a one-shot artifact. It was a library entry.
Which meant: the wedding lower third you built in March was sitting in your library in April. The "FOLLOW" button you described for the first Reel was ready to drag onto the second Reel. The podcast callout you designed for the cold open of episode 4 was waiting on episode 5.
You could regenerate it with a different style. The generateOverlayVariants function walked through modern, minimalist, bold, elegant, playful — and produced fresh versions in each style, keeping the same text and colors. You typed the name once. You got a shelf of looks.
The library was the part that made this feel like an editor and not a one-off generator. You weren't starting from a blank prompt every time. You were reaching for a tape on a shelf.
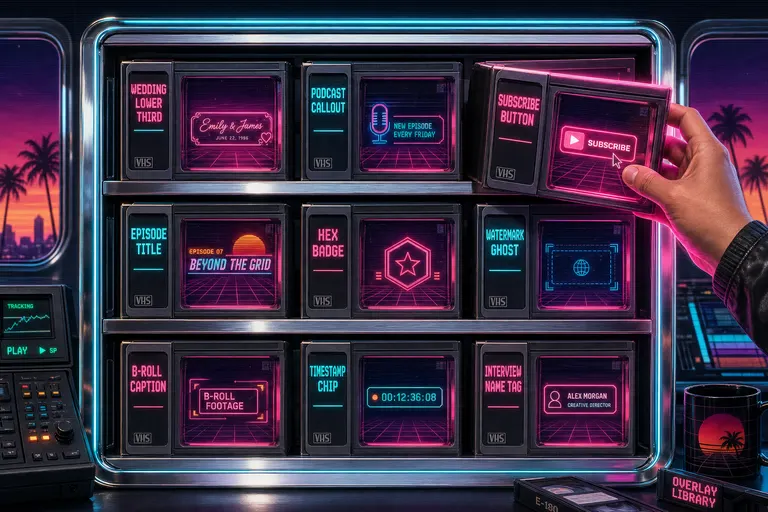
A retro chrome shelf holding rows of glowing overlay cartridges — each one a labeled transparent PNG ready to drag onto the timeline
5. Walkthrough — a branded lower third in 90 seconds
Let's run the rep.
You're cutting an interview. Your subject is on camera at 0:14. You want a lower third under their name to land at 0:16 and hold for four seconds before fading.
You open the chat. You type:
"Add a modern lower third at 0:16 that says 'Steve Moraco / Founder, VibeChopper' in cyan and magenta, hold four seconds."
The chat routed an overlay tool call with type: "lower_third", text: "Steve Moraco / Founder, VibeChopper", style: "modern", colors: { primary: "#22d3ee", secondary: "#ff3aa9" }, position: "bottom-left", duration: 4, and startTime: 16. The generator built the type-specific prompt — the one that ends with "Must have transparent background. Clean, readable typography. Professional broadcast quality."
It called gpt-image-1. The model returned a 1024x1024 base64 PNG. The server decoded it, uploaded it to object storage, and inserted an overlays row.
Then addOverlayToTimeline created a clip at start time 0:16, length 4 seconds, on a high track index reserved for overlays. It wrote the clip ID back onto the overlay record so the two stayed linked.
You scrubbed the playhead to 0:14, hit play, and watched your subject's name slide in at 0:16, hold four seconds, then leave. The cyan-and-magenta chrome bar sat clean on the wide shot — no black box, no halo, alpha doing its job.
You didn't open Photoshop. You didn't export a PNG. You didn't fight a magic wand. You typed a sentence. Ninety seconds. Less if you typed fast.
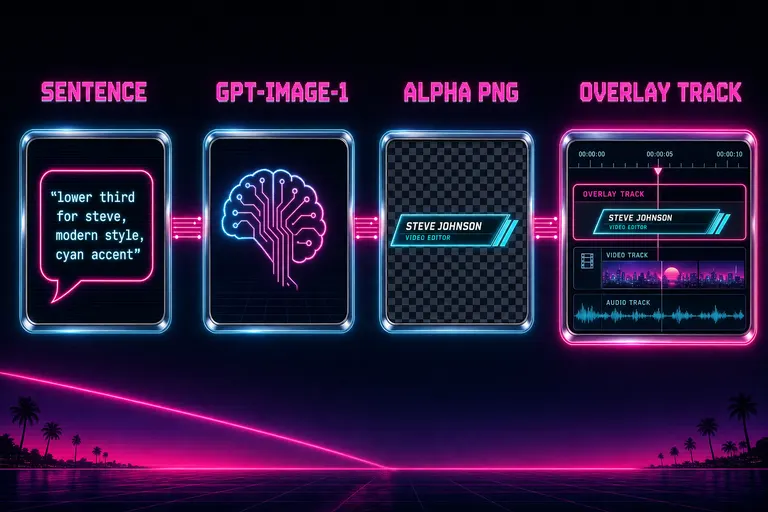
A four-node flow diagram: sentence prompt → gpt-image-1 → transparent PNG with alpha → overlay track on the timeline
6. When you wanted the AI to suggest
One more move. You didn't have to know what overlay you wanted.
The suggestOverlay function took a clip and asked the model what would help. It pulled the first five frames and their descriptions. It pulled the transcript segments inside the clip's time range. It pulled the clip's narrative role if it had one. It dropped all of that into a chat call to gpt-5-nano with one instruction: "Suggest an appropriate overlay for a video clip based on its content."
The model came back with a structured suggestion. Type. Text. Style. Position. A flag for whether the overlay should be added at all. A reason. You read the reason, decided if you agreed, and either approved, modified, or skipped.
That turned overlays from a chore into a coach. You weren't sitting there asking yourself "should this shot have a lower third?" The AI looked at the shot, read the line being spoken, knew it was the speaker's introduction, and said: Lower third. Bottom-left. Modern. Their name and title. Because they're introducing themselves and the audience needs the chyron.
You said yes. The overlay generated. The cut continued.
7. What it stopped costing
Add it up.
A Photoshop subscription you didn't need anymore for graphics work you'd otherwise have done in it. Forty minutes you'd otherwise have spent building three lower thirds. The flow-state break of Cmd-Tabbing out of the editor in the middle of a cut. The micro-grief of magic-wanding a background out of a generator's output.
All gone.
What stayed: your taste. You picked the name. You picked the colors. You picked the placement. You hit yes or no on the suggestion. The overlay generator didn't decide for you — it took the part of the job that was building rectangles with text in them and made it a sentence.
Editing is a series of decisions and a series of reps. We came for the reps.
You shot the interview. You uploaded the footage. You described the lower third. It landed on the overlay track. The cut kept cutting.
Sentence in. Lower third out. Reps in. Reps out.
See you on the timeline.
— Gnarles
A finished cut on a chrome CRT with a glowing lower third sliding onto the screen as the playhead rolls
Try the workflow
Open every feature from this post in the editor
These panels collect the features discussed above. Sign in once, finish your profile if needed, then the editor opens the first highlighted surface and walks through the tutorial.
Step 1
Add a lower third
Describe the name, the title, the vibe. We render a transparent PNG and drop it on the overlay track.
Add a lower third free →Step 2
Open the overlay library
Every overlay you generated sticks around. Reuse the wedding lower third on the next wedding. Free pour.
Open the overlay library →